
Table of Contents
Intro to Slipcasting Ceramics
Most people don’t even know slipcasting ceramics is a thing. Prior to when a ceramics teacher told me I should enroll in a slipcasting class I had not heard of it either. My teacher’s suggestion was not to learn slipcasting but rather learn how to make plaster molds. I had made two plastermolds and brought them to her class and she told me they were crap.
I studied slipcasting at Greenwich House Pottery in NYC(@greenwichhousepottery) with my teacher Hiroe Hanazono. In the weeks leading up to the first slipcasting ceramic class, I did some research. I found out slipcasting has it’s roots in industry. It is a clay forming process that utilizes plaster molds to make perfect replicas.
What is slip?
The clay or as it’s called, slip, is a liquified clay mixture of ingredients that can be almost identical to cream or throwing clays with the addition of a deflocculating chemical, such as sodium silicate. Yeah, what the heck is deflocculant? It is a chemical that keeps the particles of the mix dispersed or suspended in the water. Deflocculant is the thing that really makes the slip do what it does. The liquified clay is poured into a plaster mold to make a form.


Why Slipcasting Ceramics?
I think of it as a niche of ceramics. Many artists, and in industry where it’s typically used, slipcast to easily replicate forms. Once the mold is made it’s easy to slipcast many pieces. Therefore most artists spend most of their creative energy on decorating the piece with various finishes. With few exceptions, slipcast work can be finished with the same processes as normal cream or throwing clays.
Something I really like about slipcasting is it’s ability to make hollow forms. Think about that, most processes that use molds by default create solid forms. Concrete poured in a form comes out solid. Pour plaster into a mold, it comes out solid. A hollow form is hard to make in a mold. Slipcasting’s unique ability to make a hollow form is the foundation of many of my processes.
Some specifics on the slipcasting ceramic process.
After the liquified clay has been poured in the mold, water is absorbed by the plaster via capillary action. A residual skin is built up on the surface of the plaster inside the mold.

The longer the slip is left in the plaster mold, the thicker the skin becomes. You can think that the liquified clay is basically a liquid center with the clay skin as the shell, much like the liquid centers in a box of chocolates.
After the slip has remained in the plaster mold long enough to develop a sufficiently thick shell (typically 20-60 minutes but can be longer), the liquid center slip is drained from the mold.
The remaining shell can then be removed from the plaster mold. Slipcast ware tends to be fragile until it gets to the fairly dry leather hard stage. Once there a person can start applying finishes the same as other clays.
Demonstrating the slipcasting ceramic process.
What’s the set up?
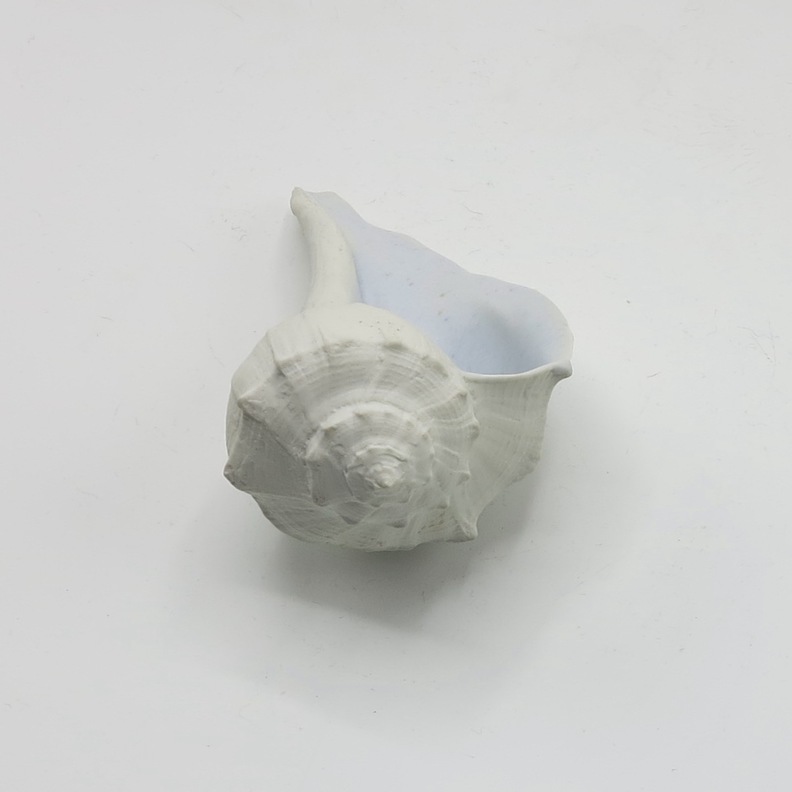
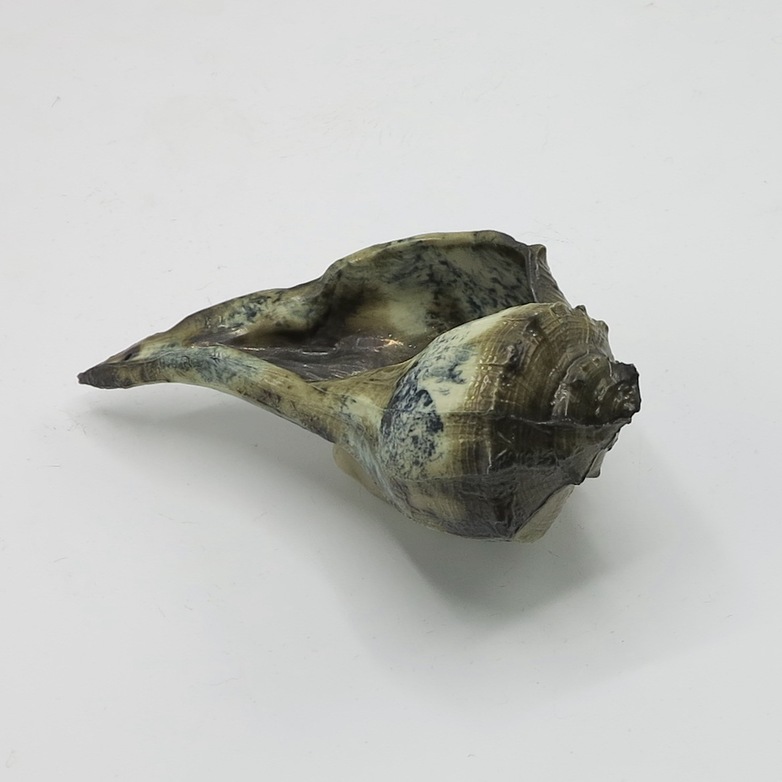
First you will need a plaster mold. Here, I am using a mold of a shell I made several years ago. I live in NYC and have limited space to store molds, so I have thrown away thousands of pounds of molds over the years….sad but true.

Second you will need slip. And third, the mold is held together with banding straps.
How do you slipcast ceramics? Video of my Process
Keep your slip well mixed and you will never have lumps. Some people strain it when they get ready to cast a mold but it’s not necessary if you’ve done the work of mixing beforehand. Then the slip is just poured in.
I time the pours rather than visually checking thickness and I found 30 minutes produced a nice shell thickness here. Typically the water being absorbed into the plaster will cause the level of the slip to reduce and often the mold needs to be topped off during the casting time. This mold has an extra long neck that is above the shell shape. If I fill the whole neck with slip I don’t have to top it off.
After 30 minutes, just pour the liquid center slip out into a catch basin or in my case the slip bucket.
You need to let the mold rest a while with the shell inside . The inner surface of the clay shell has to set up and become dry to the touch. The plaster continues to absorb water. The clay shell gives up it’s water to the plaster and is shrinking while this is happening. Usually within 30 minutes after the slip was drained the clay shell will shrink enough that it pulls away from the plaster. This is the time to remove the cast piece from the mold.
The water will pass completely through the plaster and evaporate on the outer surface of the mold. So it is important to keep the molds clean so the pores don’t get clogged. After the piece is removed from the mold that’s when the plaster should be cleaned thoroughly.
If you started with a dry mold you can usually immediately cast another piece. In a day, you might be able to cast up to three times from one mold. It will take slightly longer each time to get the same thickness shell because the plaster will still have residual water from the previous casts.
What do you do with the piece after it comes out of the mold?
When the slipcast ceramic shell first comes out of the mold it is fragile. Care must be given. You want to set the piece on a non-absorbent surface to facilitate even drying. Clay slip tends to dry quickly, if there is irregular drying the piece may crack.
If it is a larger piece I may put newspaper under it so the paper will allow shrinkage without the clay getting caught on the surface of the shelf. The paper kind of crumples up as the piece shrinks.
Let it reach leather hard and then it can be finished just like other ceramics.
Although personally I don’t do anything to the piece until it comes out of the bisque firing. Bisque firing being the first of at least two firings all ceramics go through. I don’t sand or smooth things when it’s green (unfired). The slip is fragile and dries fast. Because of that people frequently spritz a little water on a green piece to smooth things out and get rid of imperfections, however the fragile slipcast ware can deform easily. Therefore, I fire it, then sand out the imperfections.
Summary
There you have it, a slipcast ceramic clay object.
Start with a plaster mold and some liquified clay slip. Pour the slip in the mold, wait a while and pour it back out. Easy peasy and you have a clay object. Once it’s glazed and finished you might not know it was slipcast. A layperson would never guess, just as I hadn’t at the beginning.
Other posts, Instagram, Facebook and my store have my work. I’ve worked hard to make my process ridiculously complex. I’ve developed systems and molds that have into the thousands of parts. It’s meticulous, slow, heavily process oriented and I love it.
If you want to learn more Outsider Artist skills, sign up with your email to be notified when there are new posts.